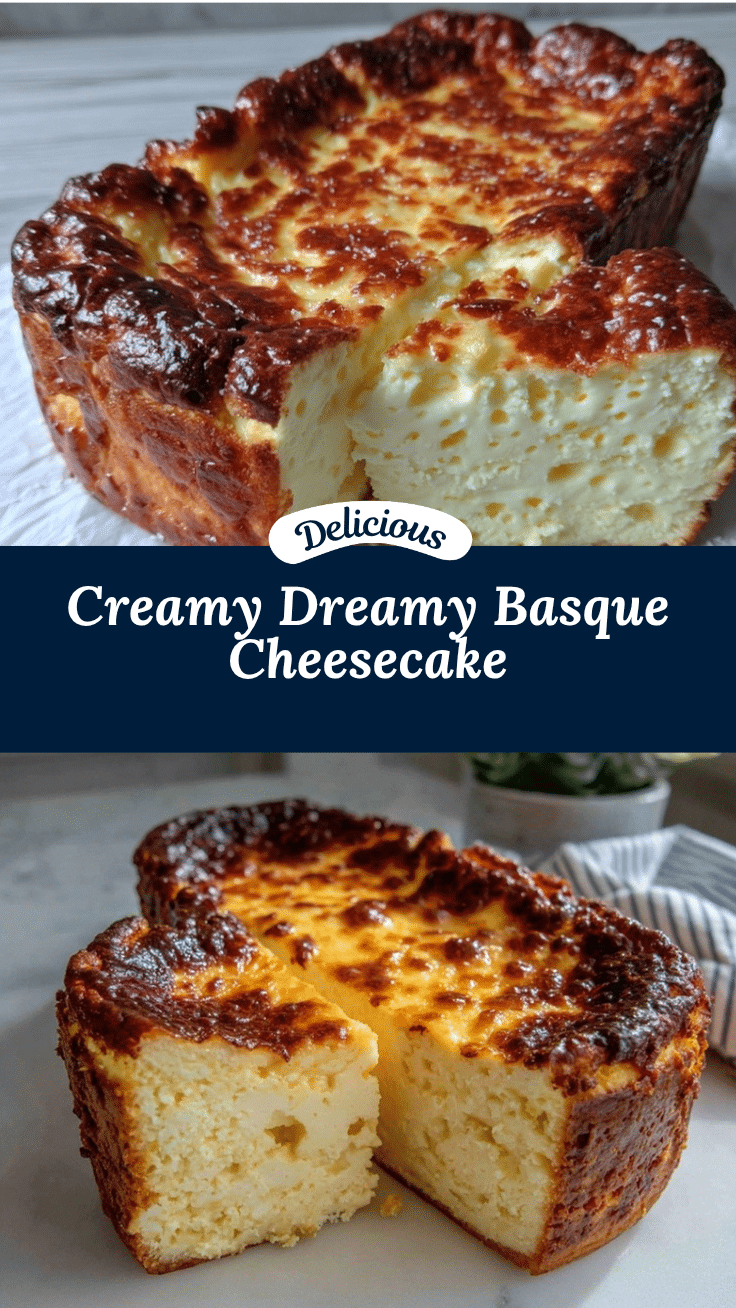
The first time I made Basque cheesecake, I was blown away by its simplicity and depth of flavor. The golden, caramelized top with its slightly cracked surface hides an interior that’s creamy, rich, and just a bit custardy. But let me tell you—shaping it into a loaf takes this already spectacular dessert to a whole new level. Whether you’re new to baking or looking for something unique, this flavorful Basque cheesecake loaf is perfect for impressing your friends and family with minimal effort!
What I love most about this recipe is how forgiving it is. No fussing over a water bath, no worrying about cracks—it’s meant to look rustic and imperfect. Plus, the loaf shape makes it easy to slice and serve. Trust me, once you try it, you’ll be hooked on this Basque-inspired twist!
Why You’ll Love This Recipe
- Beginner-Friendly: If you’ve never made cheesecake before, this recipe is the perfect starting point. It’s straightforward, and there’s no need for fancy techniques.
- Beautifully Rustic: The loaf shape adds a casual elegance, perfect for dinner parties or cozy afternoons.
- Rich and Creamy: With its custard-like center and caramelized top, this cheesecake loaf is the ultimate indulgence.
- Minimal Ingredients: You won’t need a long grocery list—just a few pantry staples.
- Make-Ahead Friendly: This dessert tastes even better the next day, making it ideal for planning ahead.
- Unique Presentation: The loaf shape sets it apart from traditional round cheesecakes, giving it an eye-catching twist.
This recipe has been tried and tested multiple times, and it never fails to deliver that wow factor. The caramelized edges and creamy center make it unforgettable, while the loaf shape makes it easy to share. It’s comfort food with a touch of sophistication.
What Ingredients You Will Need
This Basque cheesecake loaf is all about simple, high-quality ingredients that come together beautifully.
- Cream Cheese: Softened to room temperature for a smooth batter.
- Granulated Sugar: Sweetens the cheesecake and helps create that signature caramelized top.
- Heavy Cream: Adds richness and makes the texture velvety.
- Eggs: Large eggs at room temperature for easier mixing.
- All-Purpose Flour: Just a small amount to stabilize the batter.
- Vanilla Extract: For a hint of warmth and depth of flavor.
- Salt: Balances the flavors, making the sweetness shine.
- Butter: To grease the loaf pan and ensure the cheesecake doesn’t stick.
- Parchment Paper: Helps lift the cheesecake out of the pan easily.
That’s it! These ingredients are probably already in your kitchen, making this recipe super accessible. Feel free to use high-quality cream cheese and vanilla extract for the best results.
Equipment Needed
- Loaf Pan: A standard 9×5-inch pan works perfectly.
- Electric Mixer: Either a hand mixer or stand mixer will work for blending the batter smoothly.
- Large Mixing Bowl: For combining the ingredients.
- Spatula: Handy for scraping down the sides of the bowl.
- Whisk: For incorporating the eggs and cream evenly.
- Parchment Paper: To line the pan and ensure easy removal.
If you don’t have an electric mixer, you can mix by hand using a sturdy whisk—it just takes a little extra elbow grease! And if your loaf pan isn’t non-stick, parchment paper will be your best friend.
Preparation Method

- Preheat your oven: Preheat to 425°F (220°C). Line your loaf pan with parchment paper, letting the edges hang over for easy removal.
- Mix the cream cheese: In a large mixing bowl, beat 12 ounces (340g) of softened cream cheese with 3/4 cup (150g) of granulated sugar until smooth and creamy.
- Add the eggs: Crack in 3 large eggs, one at a time, mixing after each addition. The batter will look silky and slightly runny.
- Incorporate the cream: Pour in 1 cup (240ml) of heavy cream and mix until fully combined.
- Add the dry ingredients: Sift in 2 tablespoons (16g) of all-purpose flour and a pinch of salt. Stir until you have a smooth batter with no lumps.
- Flavor it: Add 1 teaspoon of vanilla extract and give it one last mix.
- Pour into the pan: Transfer the batter to your prepared loaf pan, smoothing the top with a spatula.
- Bake: Bake for 50-55 minutes. The top should be deeply golden brown, and the center should still jiggle slightly.
- Cool down: Let the cheesecake cool in the pan for 2 hours before transferring it to the fridge to chill for at least 4 hours (or overnight).
- Slice and serve: Once chilled, lift the cheesecake out using the parchment paper and slice into thick pieces. Enjoy!
Pro Tip: If the top browns too quickly, cover it loosely with aluminum foil for the last 10 minutes of baking.
Cooking Tips & Techniques
- Room Temperature Ingredients: Always use softened cream cheese and room temperature eggs for a smooth batter.
- Don’t Overmix: Overmixing can add too much air to the batter, causing the cheesecake to puff up and crack.
- Watch the Bake Time: The jiggle in the center is key—it ensures the creamy texture once the cheesecake cools.
- Cover Loosely: If the top starts browning too much, use foil to prevent burning while keeping the caramelization intact.
- Chill Thoroughly: This cheesecake is best when allowed to chill completely to set its creamy texture.
Remember, this recipe is forgiving! If your loaf cracks or the edges are extra browned, it’s all part of its charm.
Variations & Adaptations
- Chocolate Twist: Add 2 tablespoons of cocoa powder to the batter for a rich chocolate flavor.
- Citrus Zest: Mix in the zest of one lemon or orange for a zesty kick.
- Gluten-Free Option: Replace the all-purpose flour with almond flour or a gluten-free blend.
- Seasonal Fruit: Serve slices with fresh berries or a drizzle of fruit compote for added flavor.
- Mini Cheesecake Loaves: Divide the batter into smaller loaf pans for individual portions—reduce the baking time accordingly.
My personal favorite is the citrus version—it brings a bright, tangy note that pairs beautifully with the caramelized top!
Serving & Storage Suggestions
This Basque cheesecake loaf is best served chilled, sliced into thick, indulgent pieces.
- Serving: Serve cold or at room temperature. Pair with fresh berries, a dollop of whipped cream, or a drizzle of caramel sauce for extra flair.
- Storage: Store leftovers in an airtight container in the fridge for up to 4 days.
- Freezing: Wrap slices in plastic wrap and place them in a freezer-safe bag. Freeze for up to 2 months. Thaw overnight in the fridge before serving.
- Reheating: While it’s best served cold, you can gently heat slices in the microwave for 10 seconds to soften them slightly.
Pro Tip: The flavors deepen and mellow after a day in the fridge, so making it ahead of time is a smart move!
Nutritional Information & Benefits
This Basque cheesecake loaf offers indulgence with a hint of nutrition from high-quality ingredients.
- Calories: Approximately 250 per serving.
- Protein: A solid source, thanks to the cream cheese and eggs.
- Calcium: Derived from the cream cheese and heavy cream, supporting bone health.
- Gluten-Free Option: Use almond flour for those with gluten sensitivities.
While this cheesecake is undeniably rich, it’s perfect for occasional indulgence. Balance your slice with a fresh fruit salad for a lighter pairing.
Conclusion
If you’re looking for a dessert that’s easy to make but has a wow factor, this flavorful Basque cheesecake loaf is your answer. It’s creamy, decadent, and has a stunning caramelized top that’s impossible to resist. Whether you’re a beginner or an experienced baker, this recipe is for you.
I love how versatile it is—you can enjoy it plain or dress it up with your favorite toppings. Plus, the loaf shape makes it so easy to serve. So, grab your ingredients, preheat your oven, and let’s bake this beauty!
Let me know in the comments how your Basque cheesecake loaf turns out. Did you try any of the variations or come up with your own? I’d love to hear your thoughts! Share your creations and tag me—I can’t wait to see them.
FAQs
Can I use low-fat cream cheese?
Yes, but keep in mind that full-fat cream cheese gives the cheesecake its rich, creamy texture, so the results might differ slightly.
Why does my cheesecake crack?
Cracks are normal in a Basque cheesecake! They’re part of its rustic charm and don’t affect the taste.
Can I make this ahead of time?
Absolutely! It tastes even better after chilling overnight, so it’s a great make-ahead dessert.
What’s the best way to store leftovers?
Wrap slices tightly and store them in the fridge for up to 4 days or freeze for up to 2 months.
Can I use a different pan shape?
Yes, you can use a round springform pan or a square pan if you prefer. Just adjust the baking time accordingly.
Pin This Recipe!

Flavorful Basque Cheesecake Loaf Recipe Perfect for Beginners
- Total Time: 4 hours 10 minutes
- Yield: 8 servings 1x
Description
This Basque cheesecake loaf features a caramelized top and creamy, custard-like center, making it a stunning yet easy dessert for beginners and experienced bakers alike.
Ingredients
- 12 ounces cream cheese, softened
- 3/4 cup granulated sugar
- 1 cup heavy cream
- 3 large eggs, room temperature
- 2 tablespoons all-purpose flour
- 1 teaspoon vanilla extract
- Pinch of salt
- Butter, for greasing the pan
- Parchment paper
Instructions
- Preheat your oven to 425°F (220°C). Line a 9×5-inch loaf pan with parchment paper, letting the edges hang over for easy removal.
- In a large mixing bowl, beat the softened cream cheese with granulated sugar until smooth and creamy.
- Crack in the eggs one at a time, mixing after each addition until the batter is silky and slightly runny.
- Pour in the heavy cream and mix until fully combined.
- Sift in the all-purpose flour and a pinch of salt. Stir until the batter is smooth and lump-free.
- Add the vanilla extract and mix one last time.
- Transfer the batter to the prepared loaf pan, smoothing the top with a spatula.
- Bake for 50-55 minutes until the top is deeply golden brown and the center jiggles slightly.
- Let the cheesecake cool in the pan for 2 hours, then transfer it to the fridge to chill for at least 4 hours or overnight.
- Once chilled, lift the cheesecake out using the parchment paper and slice into thick pieces. Serve and enjoy!
Notes
[‘Use room temperature cream cheese and eggs for a smooth batter.’, ‘Avoid overmixing to prevent cracks and ensure a creamy texture.’, ‘Cover the top loosely with aluminum foil if it browns too quickly.’, ‘Chill thoroughly for the best texture and flavor.’]
- Prep Time: 15 minutes
- Cook Time: 55 minutes
- Category: Dessert
- Cuisine: Basque
Nutrition
- Serving Size: 1 slice
- Calories: 250
- Sugar: 16
- Sodium: 150
- Fat: 18
- Saturated Fat: 11
- Carbohydrates: 18
- Protein: 4
Keywords: Basque cheesecake, cheesecake loaf, easy dessert, caramelized cheesecake, creamy cheesecake, beginner-friendly dessert