Introduction
The smell of freshly baked sourdough bread wafting through the kitchen is enough to make anyone’s day better. It’s one of those small joys in life that feels incredibly comforting. For me, this soft and chewy sourdough bread recipe was a game-changer. I first fell in love with sourdough during a lazy Sunday morning at a quaint bakery, and ever since, I’ve been determined to recreate that same magic in my own kitchen.
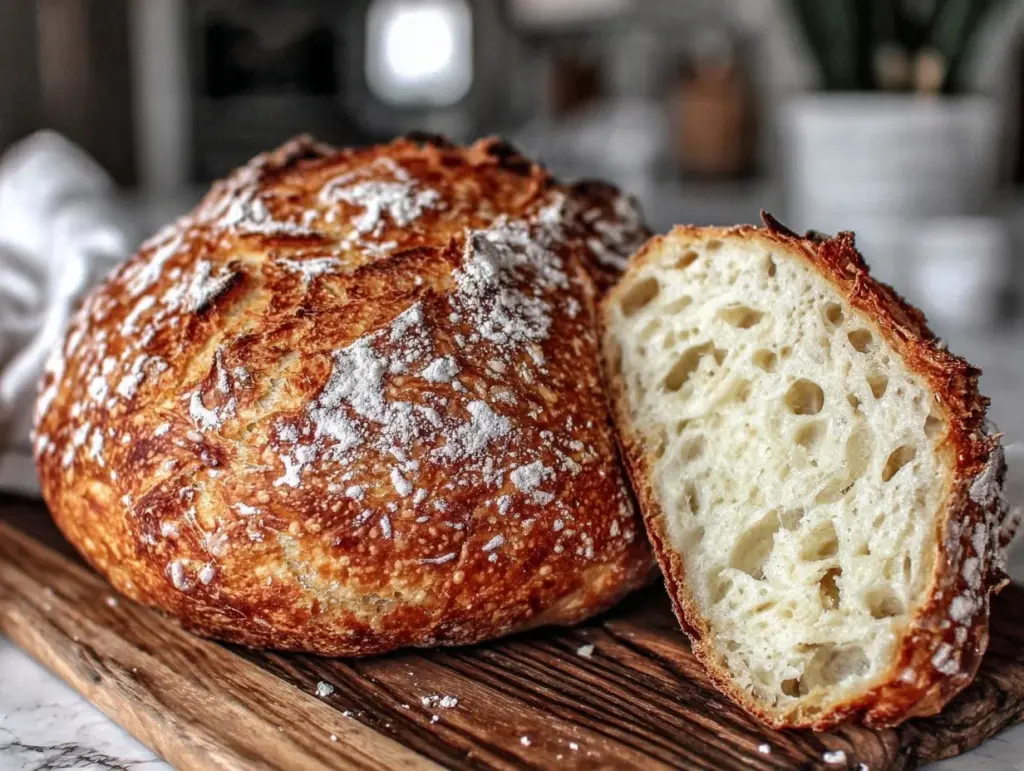
If you’ve ever felt intimidated by sourdough bread, don’t worry—you’re not alone. Honestly, I used to think sourdough was reserved for expert bakers who had hours of free time. But after a little trial and error, I discovered a surprisingly easy method that’s perfect for beginners. This recipe yields a loaf with a golden crust, a soft interior, and that signature tangy flavor—basically everything you want in sourdough bread!
Whether you’re new to baking or you’ve been around a mixing bowl a few times, this recipe will make you feel like a pro. Trust me, nothing beats the satisfaction of slicing into your own homemade sourdough bread. Ready to give it a try?
Why You’ll Love This Recipe
- Beginner-Friendly: No fancy techniques or equipment required—this recipe breaks it all down for you.
- Simple Ingredients: Flour, water, salt, and sourdough starter. That’s it!
- Soft and Chewy Texture: Perfectly balanced for sandwiches, dipping, or just eating warm with butter.
- No Kneading: Forget about sore arms—this recipe uses a stretch-and-fold technique that’s easy and effective.
- Unbelievably Delicious: The tangy flavor and slight sweetness are just irresistible.
- Customizable: Add seeds, herbs, or even cheese to make it your own.
What really sets this recipe apart is how approachable it is. I’ve tested it more times than I can count to ensure it works for even the most hesitant bakers. Plus, the step-by-step method ensures you won’t feel overwhelmed. Once you try it, you’ll see why sourdough bread-making is such a rewarding experience!
What Ingredients You Will Need
This recipe relies on simple pantry staples to create a loaf that feels anything but basic. Let’s take a closer look at what you’ll need:
- Flour: Use bread flour for structure and chewiness. All-purpose flour works too but might yield a softer loaf.
- Water: Filtered or room temperature water is best to avoid chlorine interfering with the fermentation process.
- Salt: A pinch of sea salt enhances the flavor and controls the fermentation rate.
- Sourdough Starter: The star of the show! Use an active and bubbly starter for the best results. (If yours isn’t very active, feed it and wait a few hours before using.)
Optional additions:
- Seeds: Add chia, sesame, or flax seeds for extra texture.
- Herbs: Rosemary, thyme, or garlic powder work beautifully in the dough.
- Cheese: Fold in shredded cheese for a savory twist.
Don’t have a sourdough starter yet? No worries—you can make one from scratch with just flour and water. It takes about a week but is totally worth it!
Equipment Needed

You don’t need a professional bakery setup to make amazing sourdough bread. Here’s what I recommend:
- Mixing Bowl: A large bowl to mix and ferment your dough.
- Bench Scraper: Helpful for dividing and shaping the dough.
- Dutch Oven: Creates steam and gives your bread a beautiful crust. If you don’t have one, use a baking stone or a cast-iron skillet with an inverted oven-safe bowl on top.
- Kitchen Scale: For precise measurements—especially important in bread-making!
- Clean Towel: Use to cover your dough during fermentation.
If you’re just starting out, don’t worry about buying fancy equipment. I’ve made this bread using a regular baking sheet and a large bowl—it works just as well!
Preparation Method
- Feed Your Starter: Ensure your sourdough starter is bubbly and active by feeding it a few hours before you start.
- Mix the Dough: In a large bowl, combine 500 g (4 cups) of bread flour, 350 ml (1 ½ cups) of water, and 10 g (2 tsp) of sea salt. Add 100 g (½ cup) of sourdough starter. Mix until no dry flour remains—it’s okay if the dough looks shaggy at this stage.
- Autolyse: Cover the bowl with a clean towel and let the dough rest for 30 minutes. This helps the flour absorb water.
- Stretch and Fold: Wet your hands and gently stretch and fold the dough 4-5 times around the bowl. Repeat this process every 30 minutes for 2 hours.
- Bulk Fermentation: Cover the bowl and let the dough ferment at room temperature for 4-6 hours, or until it has doubled in size.
- Shape the Dough: Lightly flour your work surface and shape the dough into a round ball. Place it seam-side up in a floured proofing basket or bowl lined with a towel.
- Second Rise: Cover and let the dough rise for 1-2 hours, or refrigerate overnight for a slower fermentation.
- Preheat the Oven: Heat your oven to 500°F (260°C). Place your Dutch oven inside to preheat for 30 minutes.
- Score and Bake: Turn your dough onto parchment paper and make a few cuts on the top with a sharp knife. Carefully transfer the dough to the hot Dutch oven, cover with the lid, and bake for 20 minutes. Remove the lid and bake for another 20-25 minutes until golden brown.
- Cool: Let the bread cool completely on a wire rack before slicing—it’s worth the wait!
Cooking Tips & Techniques
Here are some tips to ensure your sourdough bread turns out perfectly:
- Don’t Rush: Sourdough is all about patience. Let it ferment for the recommended time—this is how you get that amazing flavor!
- Use a Kitchen Scale: Accurate measurements are essential for consistent results.
- Adjust Hydration: If your dough feels too sticky, add a bit more flour. If it’s too dry, sprinkle in water.
- Practice Scoring: A lame or sharp knife works best for scoring. Don’t press too hard—work quickly and confidently.
- Steam Is Key: Baking in a Dutch oven traps steam, creating that crispy crust. If you don’t have one, place a tray of water in the oven while baking.
And remember, every loaf tells a story. If your first attempt isn’t perfect, embrace it—it’s all part of the sourdough journey!
Variations & Adaptations
Looking to mix things up? Here are some fun ways to adapt this recipe:
- Gluten-Free: Swap the flour with a gluten-free blend and adjust water as needed.
- Seasonal Add-Ins: Fold in cranberries and walnuts in winter or fresh herbs in summer.
- Flavor Boost: Add roasted garlic, caramelized onions, or shredded cheese to the dough.
- Different Shapes: Make baguettes, rolls, or even focaccia instead of a round loaf.
Personally, I love adding rosemary and sea salt for a rustic flavor. What’s your favorite twist?
Serving & Storage Suggestions
This soft and chewy sourdough bread is best served warm with butter or olive oil. It pairs beautifully with soups, salads, or even your morning coffee.
To store:
- Room Temperature: Wrap the loaf in a clean towel or store in a bread box for up to 2 days.
- Refrigerator: Wrap tightly in plastic wrap and store for up to a week.
- Freezer: Slice the bread, wrap in foil, and freeze for up to 3 months. Thaw and reheat in the oven before serving.
Pro tip: The flavors deepen over time, making day-old sourdough perfect for toast or croutons!
Nutritional Information & Benefits
Sourdough bread offers a range of health benefits:
- Digestive Health: Fermentation makes it easier to digest.
- Low Glycemic Index: Won’t spike your blood sugar like other breads.
- Natural Ingredients: No preservatives or artificial additives.
Each slice is approximately 150 calories, with 28 g of carbs, 5 g of protein, and 1 g of fat. It’s a wholesome choice for a healthy lifestyle!
Conclusion
This soft and chewy sourdough bread recipe is truly a labor of love, but I promise the results are worth every minute. Once you see that golden crust and feel the pillowy interior, you’ll understand why homemade sourdough is such a joy.
Feel free to customize this recipe and make it your own—it’s endlessly adaptable! I’d love to hear how your first loaf turns out, so drop a comment or share your version with me.
Happy baking, and remember: every loaf is a small victory. You’ve got this!
FAQs
Can I make sourdough bread without a Dutch oven?
Yes! Use a baking stone or cast-iron skillet with an inverted oven-safe bowl on top to trap steam.
How do I know if my sourdough starter is active?
Your starter should be bubbly, doubled in size, and have a slightly tangy smell. Feed it regularly for best results.
Can I freeze sourdough bread?
Absolutely. Slice the bread, wrap it tightly in foil, and freeze for up to 3 months.
Why is my sourdough bread dense?
This usually happens if the dough didn’t ferment long enough or the starter wasn’t active enough. Be patient and let the dough rise fully!
How do I keep my sourdough starter alive?
Feed your starter daily with equal parts flour and water. If you’re not baking often, store it in the fridge and feed it weekly.
Pin This Recipe!


Soft and Chewy Sourdough Bread Recipe Perfect for Beginners
- Total Time: 6-8 hours (including fermentation)
- Yield: 1 loaf 1x
Description
This beginner-friendly sourdough bread recipe yields a loaf with a golden crust, soft interior, and tangy flavor, perfect for sandwiches or enjoying warm with butter.
Ingredients
- 4 cups bread flour (500 g)
- 1 ½ cups water (350 ml)
- 2 teaspoons sea salt (10 g)
- ½ cup sourdough starter (100 g)
- Optional: chia seeds, sesame seeds, flax seeds, rosemary, thyme, garlic powder, shredded cheese
Instructions
- Feed your sourdough starter a few hours before starting to ensure it’s bubbly and active.
- In a large bowl, combine bread flour, water, sea salt, and sourdough starter. Mix until no dry flour remains.
- Cover the bowl with a clean towel and let the dough rest for 30 minutes to autolyse.
- Wet your hands and gently stretch and fold the dough 4-5 times around the bowl. Repeat every 30 minutes for 2 hours.
- Cover the bowl and let the dough ferment at room temperature for 4-6 hours, or until it has doubled in size.
- Lightly flour your work surface and shape the dough into a round ball. Place it seam-side up in a floured proofing basket or bowl lined with a towel.
- Cover and let the dough rise for 1-2 hours, or refrigerate overnight for a slower fermentation.
- Preheat your oven to 500°F (260°C) and place your Dutch oven inside to preheat for 30 minutes.
- Turn your dough onto parchment paper and score the top with a sharp knife. Transfer the dough to the hot Dutch oven, cover with the lid, and bake for 20 minutes.
- Remove the lid and bake for another 20-25 minutes until golden brown.
- Let the bread cool completely on a wire rack before slicing.
Notes
[‘Let the dough ferment for the recommended time to achieve the best flavor.’, ‘Use a kitchen scale for accurate measurements.’, “Adjust hydration by adding more flour if the dough is too sticky or more water if it’s too dry.”, ‘Practice scoring with a sharp knife or lame for the best results.’, “If you don’t have a Dutch oven, use a baking stone or cast-iron skillet with an inverted oven-safe bowl on top to trap steam.”]
- Prep Time: 30 minutes
- Cook Time: 45 minutes
- Category: Bread
- Cuisine: American
Nutrition
- Serving Size: 1 slice
- Calories: 150
- Sodium: 200
- Fat: 1
- Carbohydrates: 28
- Fiber: 1
- Protein: 5
Keywords: sourdough bread, beginner-friendly, homemade bread, soft bread, chewy bread, no knead bread